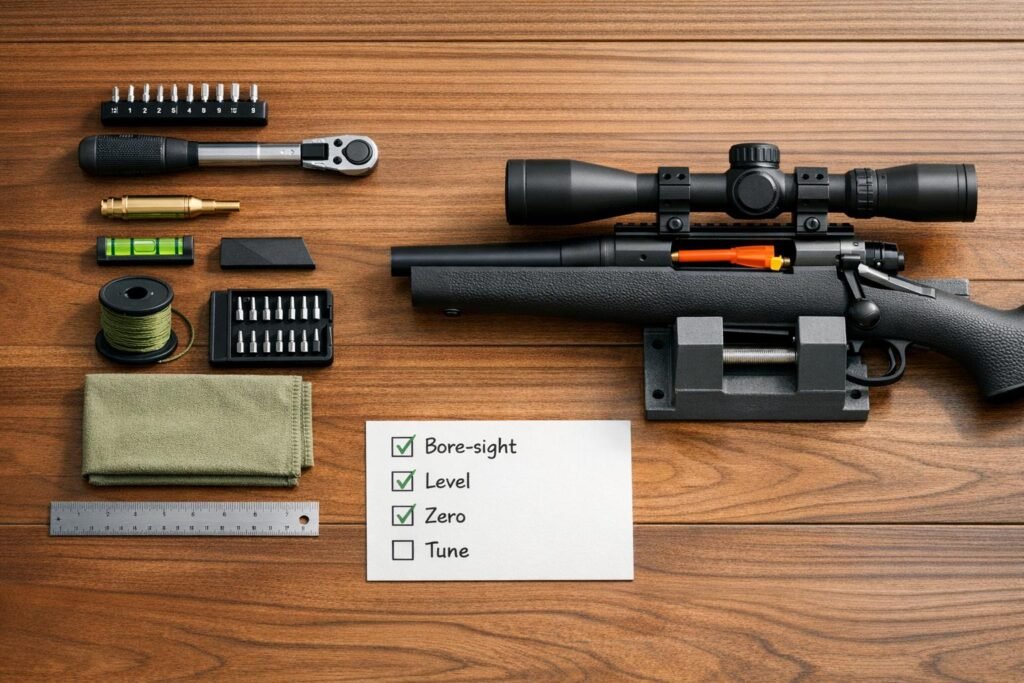
Before heading out, ensure your scope is clean, secure, and functioning perfectly. A poorly maintained scope can ruin your accuracy and ethical hunting. Here’s a quick checklist to get your scope field-ready:
- Clean lenses carefully: Use a blower bulb, lens brush, and microfiber cloth. Avoid over-cleaning to prevent scratches.
- Check for moisture and damage: Inspect for fogging, scratches, or coating issues. Professional repair may be needed for serious problems.
- Secure the mount: Tighten screws with a torque wrench and ensure the scope is level.
- Test functionality: Verify turret adjustments, confirm your zero, and test illuminated reticles in various lighting.
- Field test in real conditions: Assess clarity, light performance, and eye relief during dawn or dusk.
Pro Tip: Use lens covers and store your scope in a dry, clean place to extend its life. Regular maintenance ensures precision and protects your investment.
How to Properly Clean Your Optics | Do’s & Don’ts
Step 1: Clean and Check Lenses
Your scope’s lenses are its "eyes", and keeping them in good condition is crucial for clear visibility. Here’s how to take care of them properly.
Tools You’ll Need
Using the right tools is essential to avoid damaging your lenses. Include the following in your cleaning kit:
- Blower bulb (steer clear of canned air, as it can release damaging liquid)
- Camel hair brush or lens pen
- Microfiber lens cloth
- Lens cleaning solution (like 90% isopropyl alcohol or a quality eyeglass cleaner)
- Lens tissue
- Protective lens covers
"If it’s not dirty, don’t clean it!" – Leupold Staff
This advice from Leupold highlights the importance of only cleaning lenses when absolutely necessary. Over-cleaning can sometimes do more harm than good.
Checking for Moisture
Fogging or moisture can affect performance. Here’s how to check:
- Internal Moisture
- Inspect for fogging or moisture trapped between lenses. Use good lighting to spot any issues.
- If you see internal moisture, it may mean the seals are damaged, and professional repair is needed.
- External Moisture
- Let the scope adjust to room temperature before cleaning.
- Use a blower bulb to remove loose water droplets.
- Gently dab any remaining moisture with a microfiber cloth.
Inspect for Damage
Carefully check the lenses for any signs of damage:
- Scratches: Hold the scope at an angle under good lighting to spot scratches.
- Coating Problems: Look for peeling or discoloration in the lens coatings.
- Seal Condition: Examine the edges of the lenses for any seal issues.
| Damage Type | Action Needed | Effect on Performance |
|---|---|---|
| Light Scratches | Continue using | Minimal impact |
| Deep Scratches | Seek professional repair | Noticeable impact |
| Coating Problems | Return to the manufacturer | Reduces light transmission |
| Seal Issues | Immediate professional repair | Can cause fogging |
Tips for Lens Care
- Always use protective lens covers when the scope isn’t in use. This reduces the need for frequent cleaning and prevents damage.
- Never clean lenses with your shirt, paper towels, or facial tissues – these can leave micro-scratches that degrade clarity over time.
- When cleaning, use a spiral motion starting from the center and moving outward. Apply cleaning solution to the cloth, not directly to the lens.
With your lenses cleaned and inspected, you’re ready to move on to Step 2: Checking your scope’s mount.
Step 2: Check Mount Security
After cleaning and inspecting your lenses, the next step is making sure your mount is secure.
Tighten Base and Rings
Set the correct torque for your screws – too tight can damage parts, while loose screws can cause the scope to shift. A torque wrench helps you apply just the right amount of force. Many manufacturers suggest using blue thread locker on base screws (applied to dry threads), but avoid using it on ring screws.
Check All Screws
Go over all the screws to ensure they’re tightened properly. For ring screws, tighten them in a criss-cross pattern to spread the pressure evenly.
"Manufacturer’s torque specs are based on dry threads, and putting anything wet on the screw will change the torque value. You may end up overtightening the screws, damaging your scope."
Level the Scope
A properly leveled scope is key to maintaining shooting accuracy. Use a leveling kit to ensure the reticle is vertically aligned with your rifle’s action:
- Attach a leveling kit with a barrel clamp and reference levels.
- Adjust the reticle so it’s vertically aligned with the rifle’s action.
- Make sure the scope is on the same horizontal plane as the rifle’s action.
Check your scope mount regularly. Even rifles with mild recoil can cause screws to loosen over time. Including this step in your pre-hunt routine can help you avoid accuracy problems in the field.
sbb-itb-31b92c7
Step 3: Test Basic Functions
Check Turret Operation
Make sure the turrets adjust properly to maintain accuracy. Each adjustment should feel crisp and precise.
To check tracking accuracy, try the box test:
- Fire a 3-shot group at your zero point.
- Adjust elevation up by 1 Mil and windage right by 1 Mil.
- Fire another 3-shot group.
- Return to the original settings and fire a final group. The last group should align with the first.
"One of the most vital tests you can perform on an optic is to verify it ‘tracks’ correctly." – Adam Scepaniak
Once you’ve confirmed turret functionality, move on to verifying your zero.
Zero Confirmation
After mounting or adjusting your scope, confirm your zero at various distances that match your typical hunting scenarios.
"A wise shooter once said that all scopes are garbage until proven otherwise, and over the years, I have found that to be sage advice." – Adam Scepaniak
Test Light and Power
For scopes with illuminated reticles, check brightness levels in different lighting conditions. Test battery life, replace old batteries, and keep spares on hand.
Pro Tip: Test your illuminated reticle both in bright daylight and low-light settings. What looks fine indoors might fade in direct sunlight or feel too bright at dawn or dusk.
While testing, ensure:
- Smooth magnification adjustments
- A sharp reticle focus across all power levels
- Comfortable and consistent eye relief
- Proper parallax adjustment (if your scope includes this feature)
Fix any problems before heading out. Completing these tests ensures your scope is ready for any hunting environment.
Step 4: Field Testing
Move beyond bench checks and test your scope in real-world settings to ensure it performs as expected.
Light Condition Tests
Evaluate your scope under real lighting conditions, especially during dawn and dusk when visibility is most challenging.
Set up targets at your usual shooting distances and observe them as light levels shift. Pay attention to:
- Image clarity and contrast
- Retention of target details
- Reticle visibility
- How well light passes through the scope
Pro Tip: Scopes with a light transmission rate above 90% often perform better in low-light settings. Additionally, objective lenses sized between 44mm and 56mm are excellent for gathering light effectively.
"The Twilight Light Management System provides an extra 30 minutes of shooting light, which I verified during multiple dusk hunting sessions." – Richard Douglas, Firearms Instructor and Tactical Advisor
Check Internal Clarity
After testing light performance, inspect the scope’s internals for potential issues. Look out for:
- Black spots or lines within the field of view
- Water droplets on internal surfaces
- Fogging between lens elements
"While looking through a riflescope, your view should be crisp and clear at all magnification levels. If you see black spots or lines within your field of view, internal debris is to blame." – Barb Melloni
Here’s how to check for internal problems:
- Test clarity across all magnification levels.
- Use the scope in cold conditions to check for fogging (this may indicate sealing issues).
- Inspect the field of view to ensure edge-to-edge clarity.
Set Eye Position
Once you’ve confirmed the scope’s visual performance and internal clarity, adjust your eye relief to ensure a clear view and avoid recoil injuries.
- Mount the scope securely but don’t fully tighten it yet.
- Assume your typical shooting stance.
- Adjust the scope until you achieve a full sight picture.
- Locate the "sweet spot" within the optimal eye relief zone (usually about one inch).
Safety Tip: Proper eye relief is crucial to avoid injuries caused by recoil.
If you notice a black ring (scope shadow) around your view, make adjustments to:
- Your head position
- The scope’s forward or backward placement
- The mounting height
Step 5: Tools and Care Guide
Keeping your scope in top shape requires the right tools and a consistent care routine. This ensures it stays dependable during use.
Tools You’ll Need
To maintain your scope effectively, gather these must-have items:
- Lens covers or caps to protect against scratches
- A blower bulb for safely removing dust
- A camel hair brush for sweeping away fine particles
- High-quality lens tissue
- Optical cleaning solution (100% isopropyl alcohol or a specialized cleaner)
- Microfiber cloths for streak-free cleaning
- Cleanroom swabs for precision cleaning
- A soft-bristled toothbrush for cleaning the scope body
Proper Storage Tips
Storing your scope correctly is key to preserving its performance and longevity. Use protective covers and follow these tips:
- Cover the lenses with caps immediately after use
- Store the scope in a clean, dry place, away from extreme temperatures and direct sunlight
Quick Tip: Lock or close your lens caps after every shot. This reduces the need for frequent cleanings and helps maintain the lenses longer.
Setting up a regular care routine will further protect your scope from wear and tear.
Maintenance Schedule
Consistent maintenance can stop small issues from turning into big problems. Follow this simple schedule:
| Task | Frequency | Notes |
|---|---|---|
| Visual Inspection | Before each use | Look for dirt, smudges, or damage |
| Lens Cleaning | When visibly dirty | Use the proper cleaning steps |
| Body Cleaning | Monthly | Wipe the body; avoid touching the lenses |
| Deep Cleaning | Annually or as needed | Remove tough debris carefully |
Key Reminders:
- Clean your scope only when necessary to avoid unnecessary wear
- Use a blower to remove dust before applying any cleaning tools
- Never disassemble the scope, as this can cause permanent damage
For cleaning the scope body, a standard degreaser works well – just keep it away from the lenses. When cleaning the lenses, start with a blower and only use wet cleaning methods if absolutely needed.
Wrapping Up
Having a pre-hunt checklist ensures your scope is in top shape. Keeping your scope in good condition isn’t just about performance – it’s about hunting responsibly and ethically. Plus, regular upkeep helps protect your investment for the long haul.
"It’s unimaginable to think of a responsible, ethical hunter without a sufficiently sighted rifle".
By following these steps, you can avoid equipment failures when it counts most. Preventive care keeps your scope clear, precise, and dependable.
Here are three key steps to focus on:
- Clean your scope only when necessary, using the right tools.
- Double-check that your mounting and alignment are secure.
- Test your setup in different field conditions to ensure reliability.
A well-maintained scope means consistent performance, so you can concentrate on making accurate shots in the field.
Pro Tip: Keep a log of your maintenance and adjustments. This helps you spot potential problems before they impact your performance.
Make these steps part of your routine to ensure your gear is always ready when you need it.